Quick Start
Get up and running with your first Xians agent in minutes. This guide walks you through connecting a simple agent to the Xians platform, deploying it, and then enhancing it with AI capabilities.
Prerequisites
Before you begin, ensure you have following installed:
- .NET 10 SDK - Download here
Step 1: Create Your Project
Xians agents run as standard .NET applications that can be executed locally or deployed to any server environment. Start by creating a new console project:
Install Required Packages
Note: Xians.Lib version 3+ is published under
Xians.Lib, notXiansAi.Liblike previous versions.
Step 2: Connect Your Agent to Xians
Let's get your agent connected to the Xians platform right away. We'll start with a simple echo agent — no AI framework needed yet — so you can see the full platform experience first.
Get Your Xians API Key
Before proceeding, you need to:
- Set up your Xians platform instance
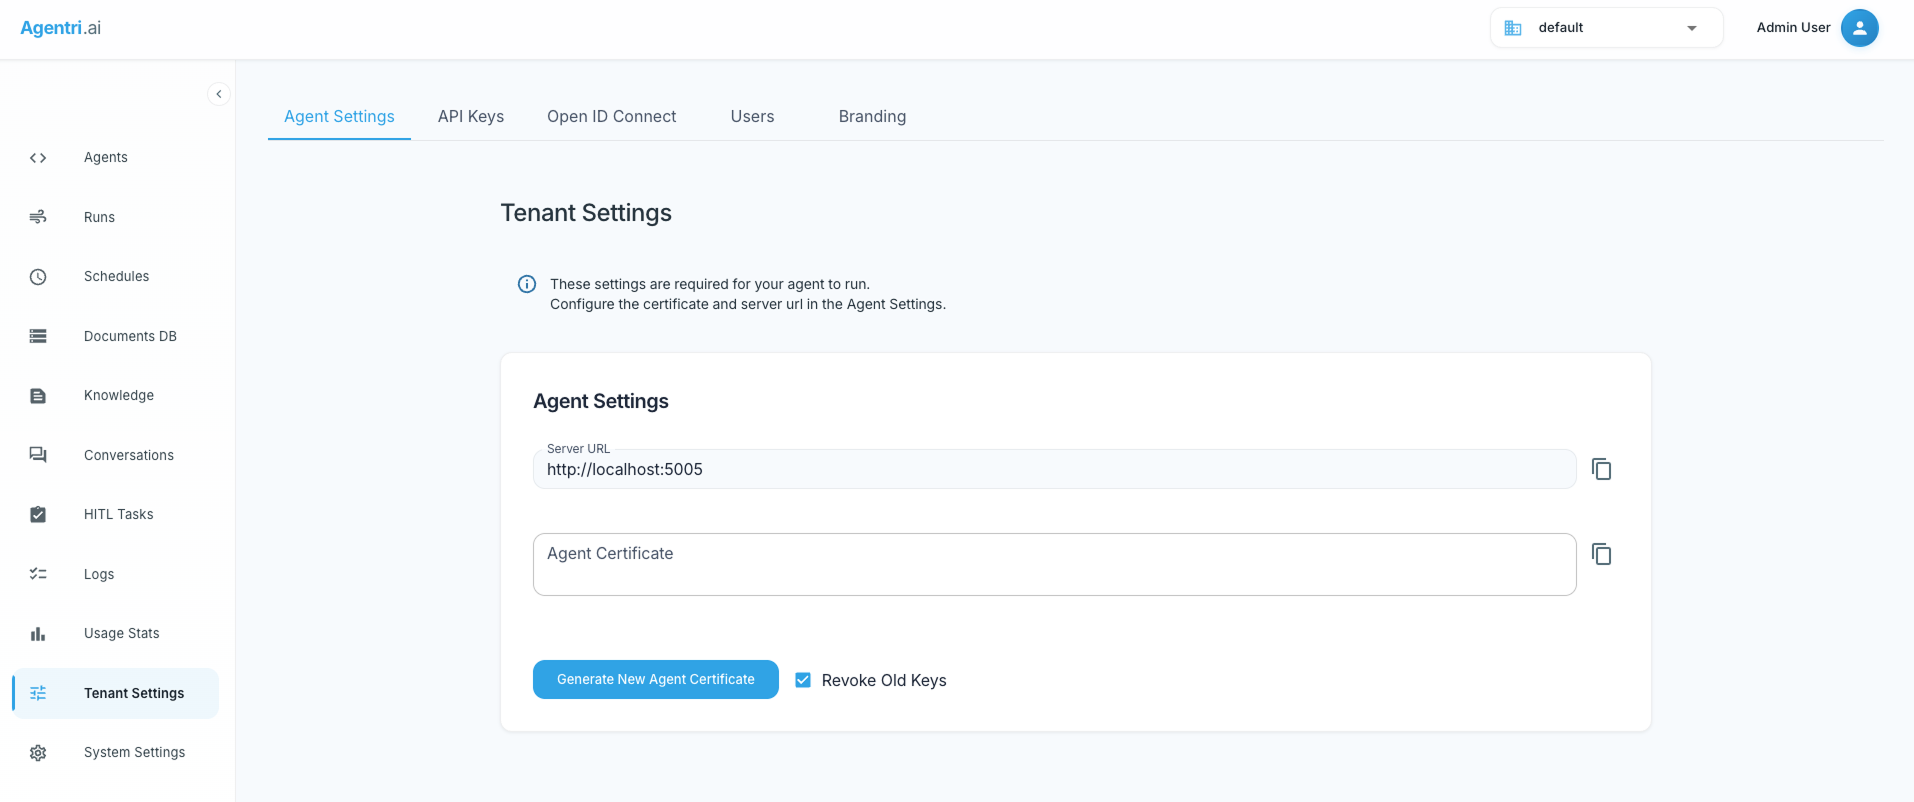
- Navigate to Tenant Admin in Agent Studio
- Copy your Agent Certificate and Server URL
Configure Environment Variables
For better security and maintainability, use a .env file to manage your credentials. This prevents accidentally committing sensitive values to version control.
Create a .env file in the root of your project:
# Xians Platform Configuration
XIANS_SERVER_URL=https://your-xians-server.com
XIANS_AGENT_SECRET=your-xians-certificate
Note: Replace the placeholder values with your actual server URL and agent certificate from the previous step.
Add .env to your .gitignore to prevent committing secrets:
Security Tip: Never commit your
.envfile to version control. Always add it to.gitignoreto protect your credentials.
Write the Echo Agent
Replace the contents of Program.cs with the following:
using DotNetEnv;
using Xians.Lib.Agents.Core;

Env.Load();

var serverUrl = Environment.GetEnvironmentVariable("XIANS_SERVER_URL")
    ?? throw new InvalidOperationException("XIANS_SERVER_URL not found in environment variables");
var xiansApiKey = Environment.GetEnvironmentVariable("XIANS_AGENT_SECRET")
    ?? throw new InvalidOperationException("XIANS_AGENT_SECRET not found in environment variables");

var xiansPlatform = await XiansPlatform.InitializeAsync(new ()
{
    ServerUrl = serverUrl,
    ApiKey = xiansApiKey
});

var xiansAgent = xiansPlatform.Agents.Register(new ()
{
    Name = "My Agent",
    IsTemplate = false  // See important notes below
});

var conversationalWorkflow = xiansAgent.Workflows.DefineSupervisor();

conversationalWorkflow.OnUserChatMessage(async (context) =>
{
    await context.ReplyAsync($"Echo: {context.Message.Text}");
});

await xiansAgent.RunAllAsync();
This agent simply echoes back whatever the user sends. No AI, no external dependencies — just a direct connection to the Xians platform.
Alternative: If you prefer not to use a
.envfile, you can replace theEnv.Load()and environment variable calls with hardcoded values, though this is not recommended for production use.
Build and Run
Your agent is now connected to Xians and listening for messages!
Important Configuration Notes
DefineSupervisor shortcut method
If your workflow is named 'Supervisor Workflow', Agent Studio by default picks that workflow when the user wants to talk to the agent.
IsTemplate Setting:
-
IsTemplate = true: Adds the agent to the system-wide Agent Templates library, making it available for any tenant admin to deploy to their tenant. This option is only available if you're a system administrator. -
IsTemplate = false(default): Immediately deploys the agent to your current tenant's Agent Store. Use this if you only have tenant-level permissions.
See Understanding the Agent Lifecycle below for how templates, deployed agents, and activated agents relate to each other.
Understanding Workflows:
- A Xians agent is a definition that represents your agent in the platform
- The actual AI logic runs in your code (using any framework you choose)
- Built-in workflows connect Xians' conversation handling capabilities to your agent logic
- One Xians agent can contain multiple built-in workflows, each connected to different implementations
Step 3: Deploy and Chat with Your Agent
Understanding the Agent Lifecycle
Agents on the Xians platform move through three levels, from a system-wide definition down to a running instance:
| Level | Scope | Where to Find It | Who Manages It |
|---|---|---|---|
| 1. Agent Templates | System-wide | System Admin → Templates | System administrators |
| 2. Deployed Agents | Tenant | Agent Settings → Agent Store | Tenant administrators |
| 3. Activated Agents | Tenant (running) | Agents | Tenant users |
Level 1: System-Scoped Agent Templates
Agent templates are system-wide definitions available to every tenant. If you registered your agent with IsTemplate = true, it appears in the Agent Templates section under System Admin:
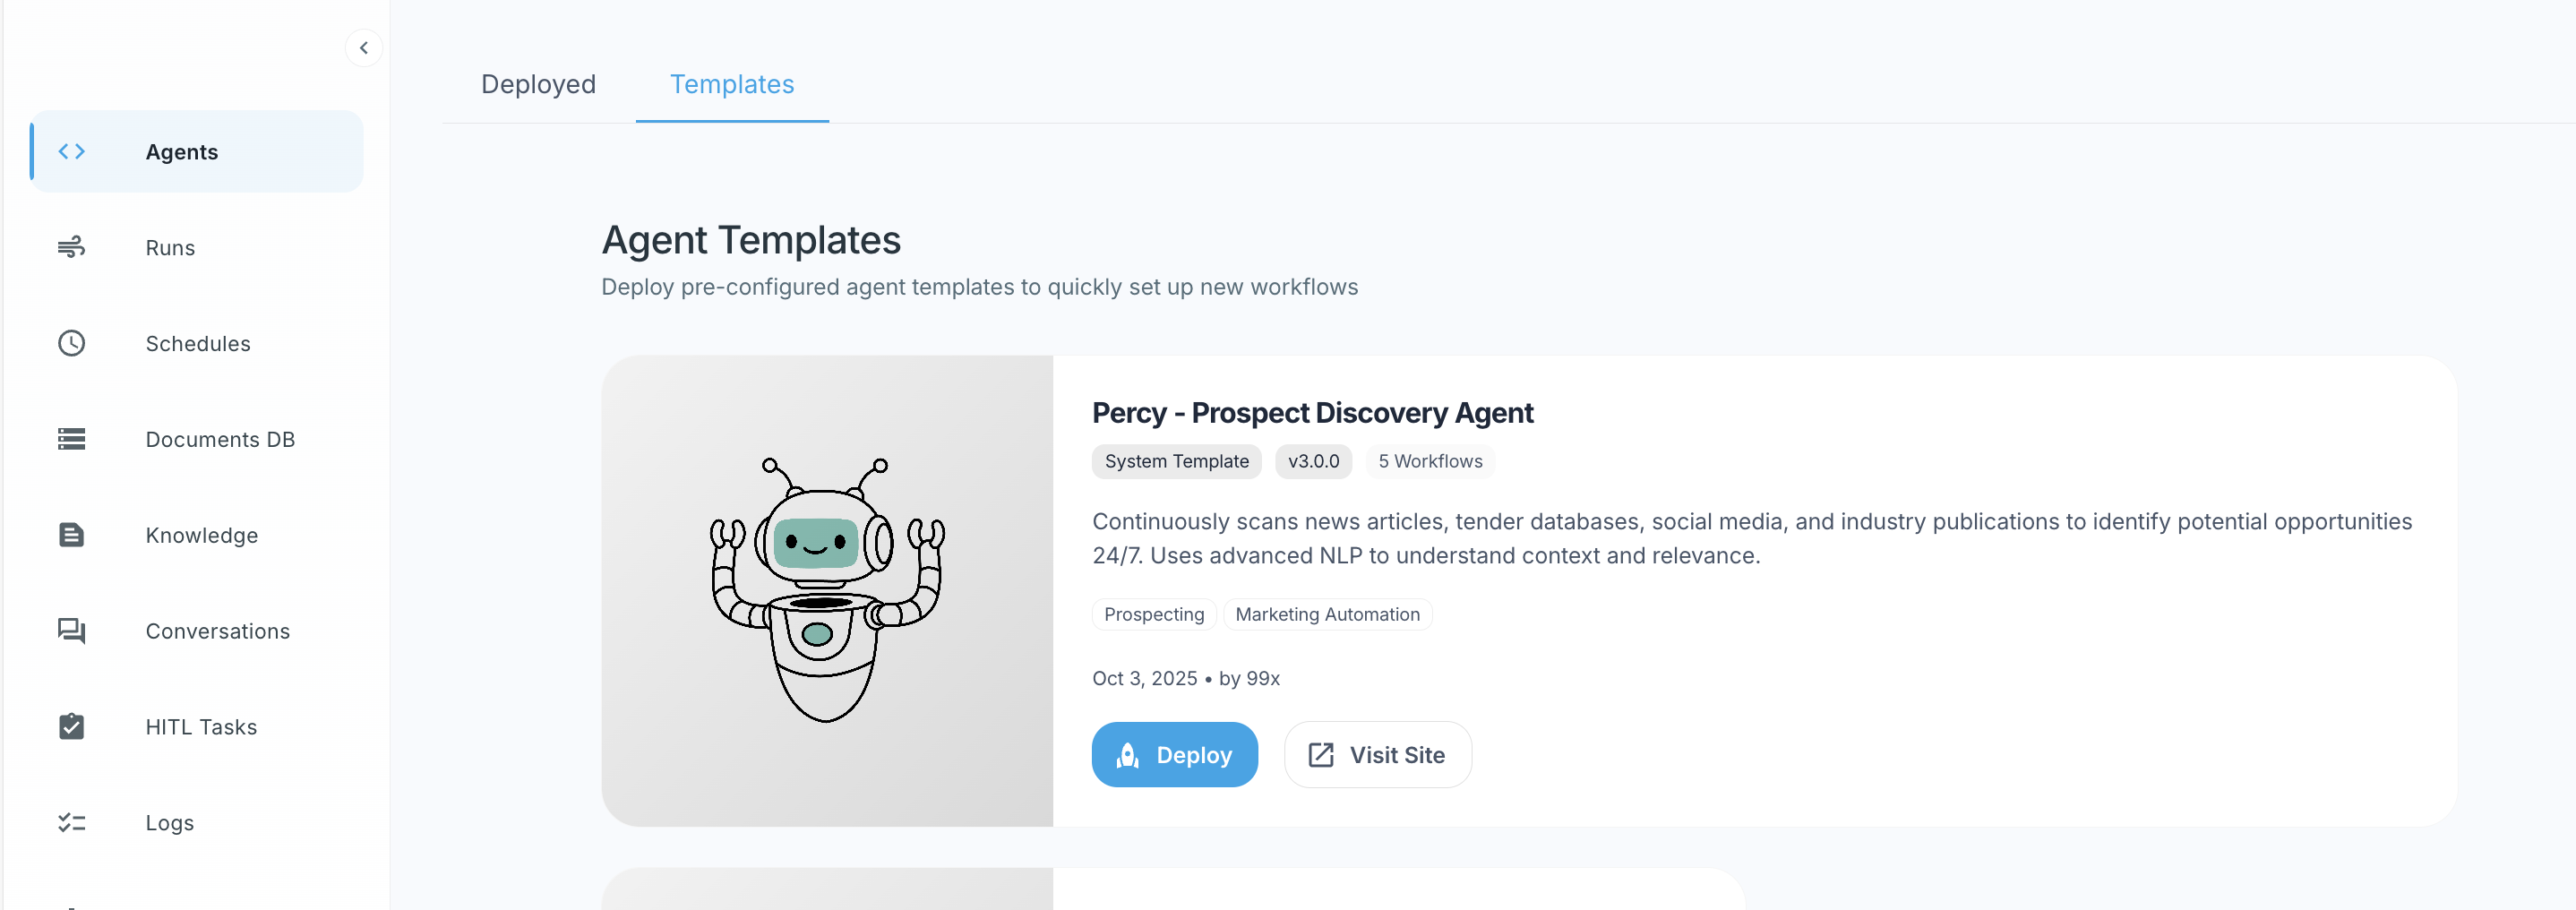
Templates are not runnable by themselves — a tenant administrator must first deploy a template to make it available within a tenant.
Level 2: Agents Deployed to a Tenant
When a template is deployed to a tenant (or when you register an agent directly with IsTemplate = false), it becomes available in that tenant's Agent Store under Agent Settings:
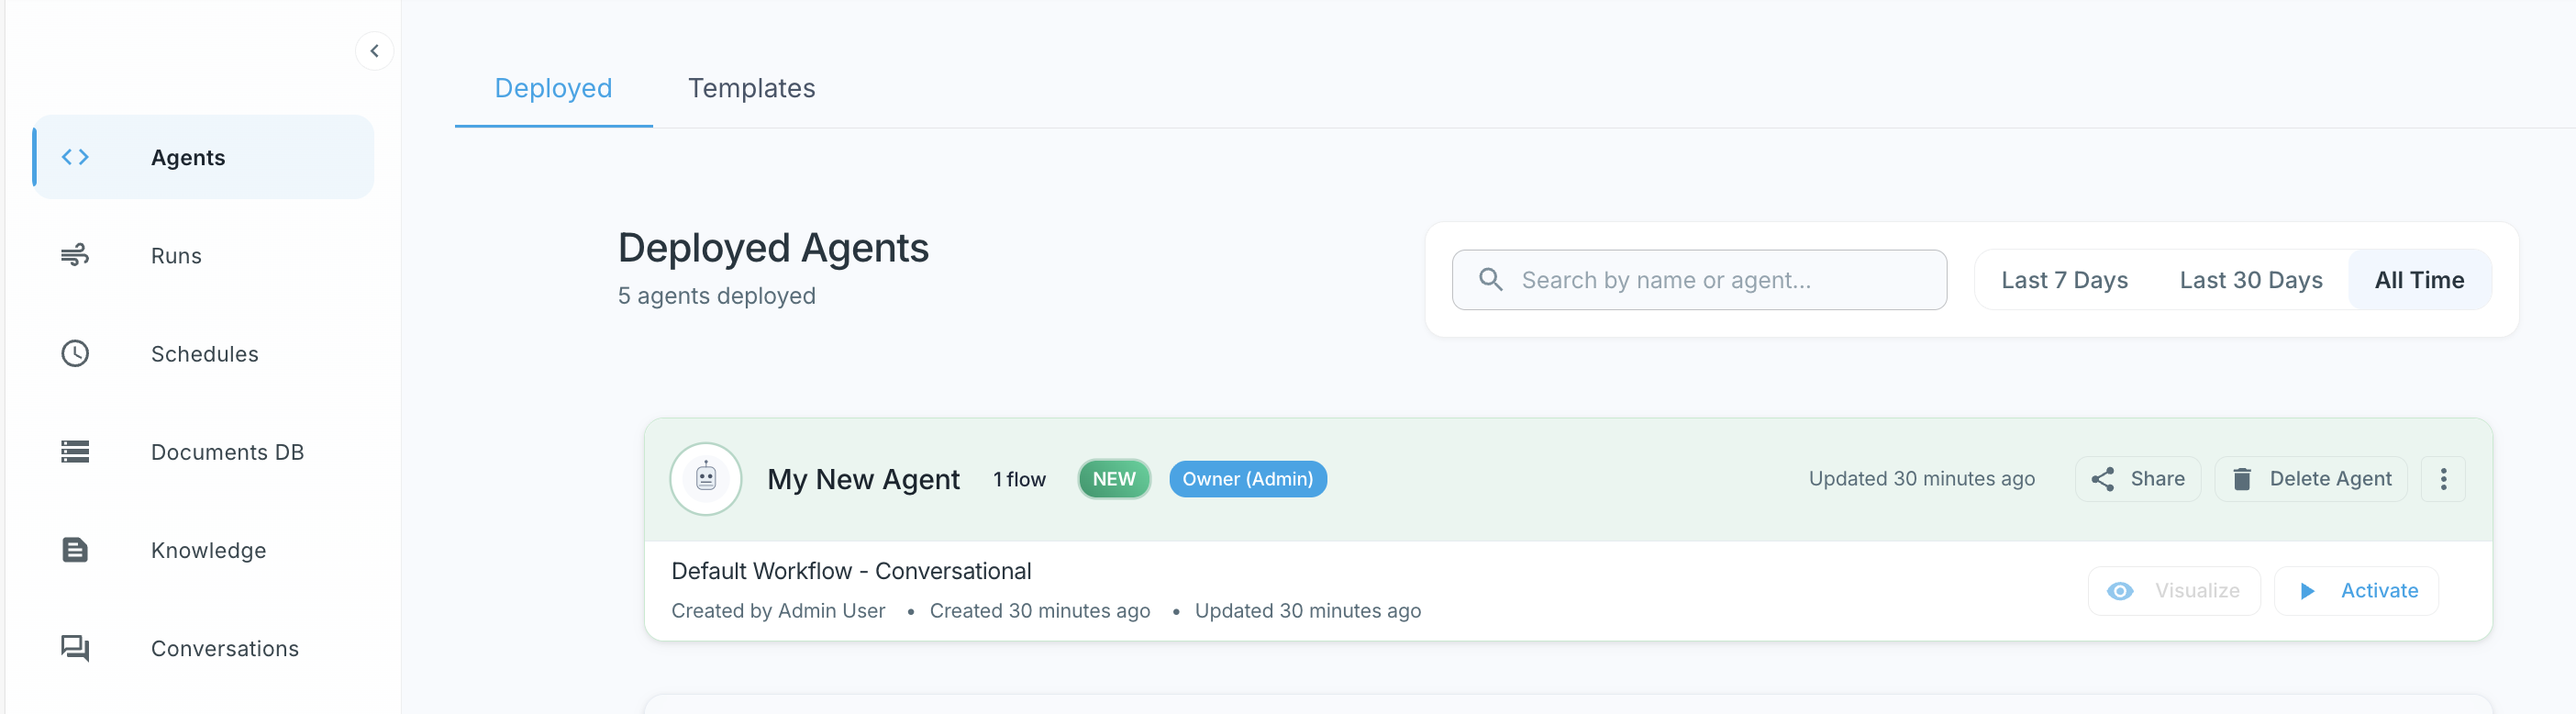
A deployed agent belongs to the tenant, but it is still just a catalog entry — it is not yet running or ready to chat.
Level 3: Activated Agents
Finally, an agent must be activated from the deployed agents in the store. Use the Activate from Store button on the Agents page. Activated agents are live, running instances that users can interact with:
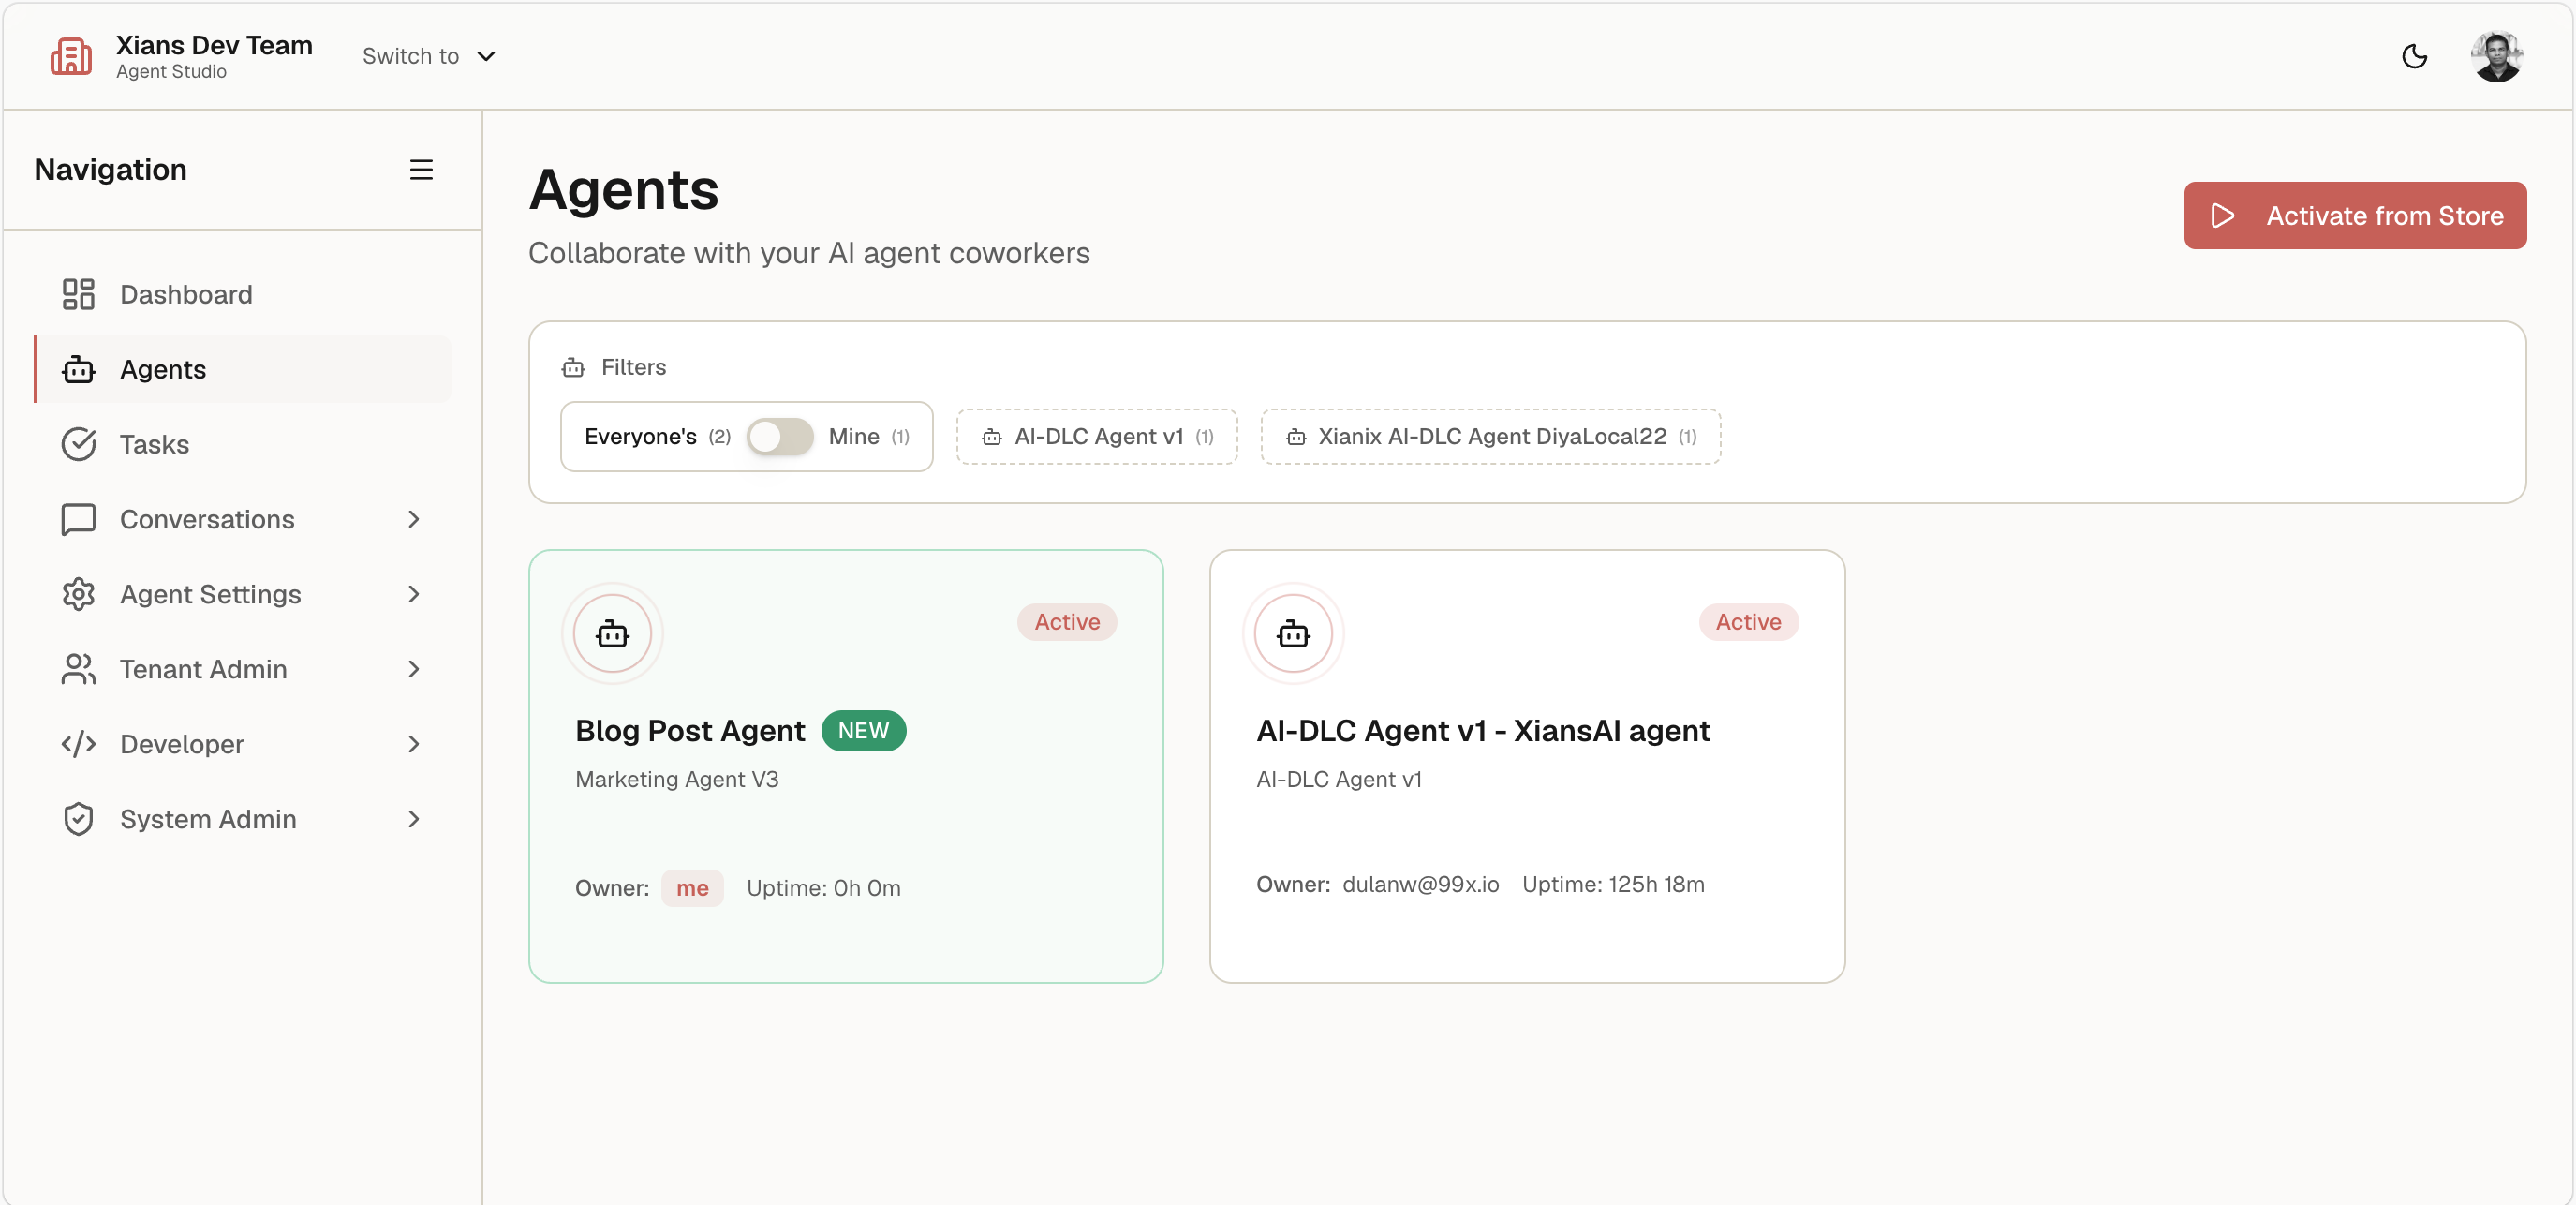
In summary: A template (system-wide) is deployed to a tenant's Agent Store, and a deployed agent is activated to become a running agent users can chat with.
Start a Conversation
Now for the exciting part — talking to your agent!
- Navigate to Conversations in Agent Studio
- Select your activated agent from the list
- Click the + button to create a new conversation
- Send a message and see it echoed back!
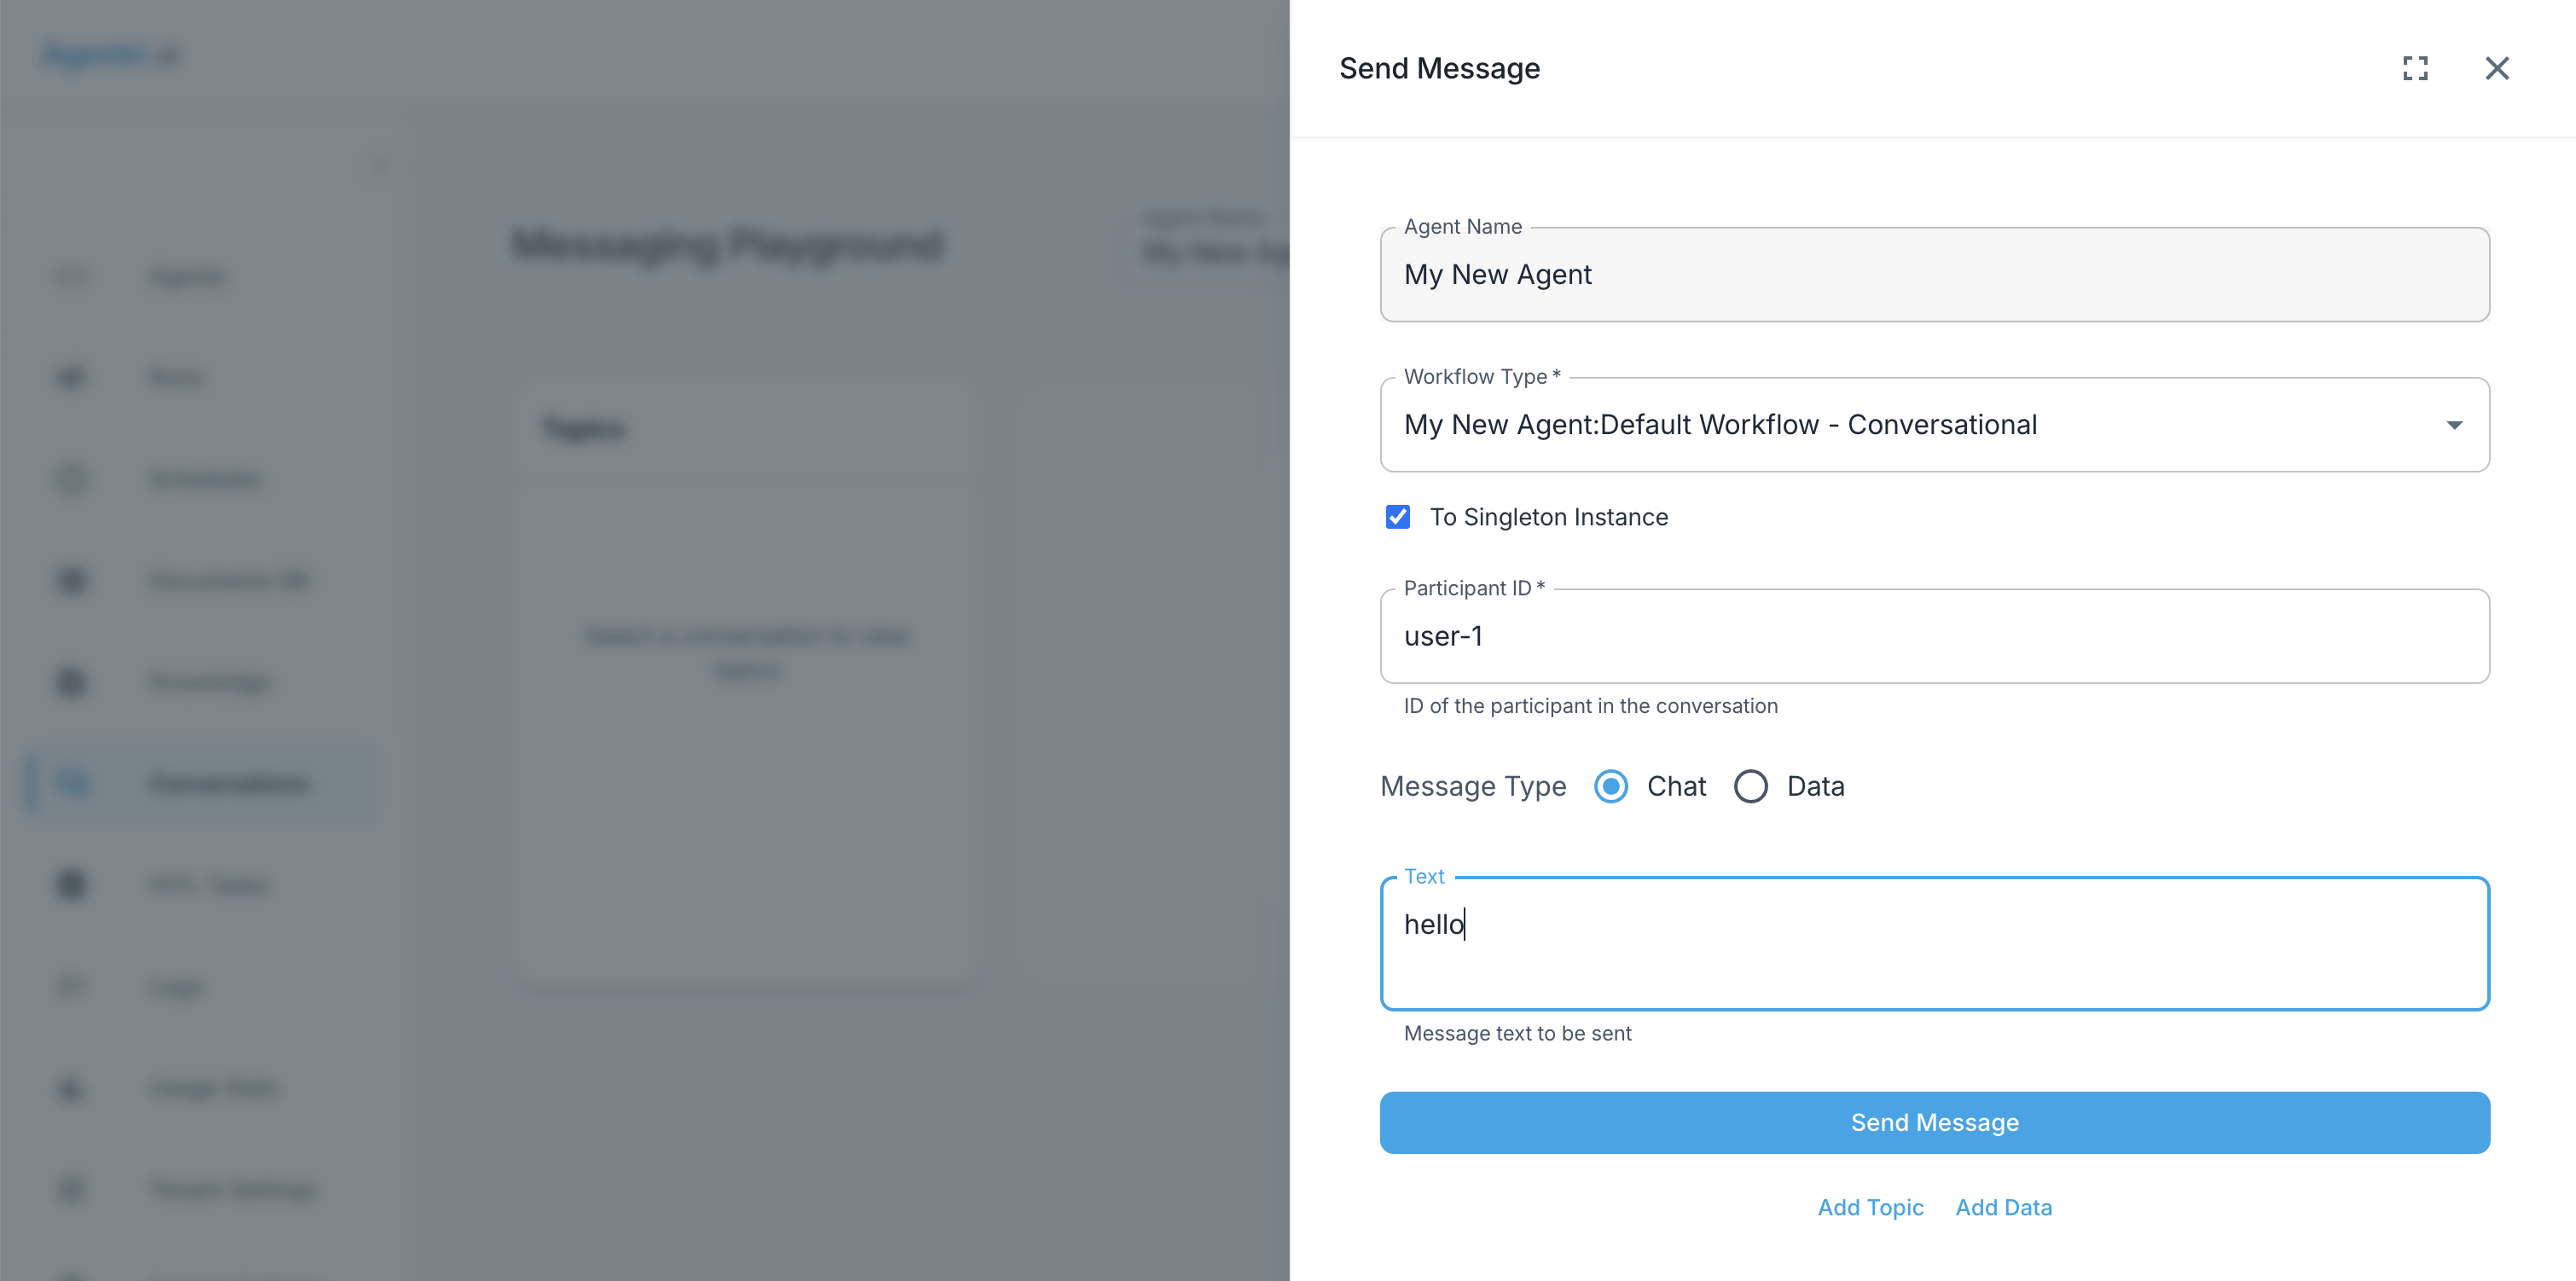
What You've Achieved: With just a few lines of code, your agent is live on the Xians platform with multi-tenancy, user management, and conversation threading — all out of the box.
Step 4: Add AI with Microsoft Agent Framework (MAF)
Now that your agent is connected to Xians, let's replace the echo logic with a real AI-powered agent using the Microsoft Agent Framework (MAF). See Official Microsoft Documentation for up-to-date information.
Prerequisites for This Step
- OpenAI API Key - Get one from OpenAI Platform
Install MAF Packages
Note: Please check if stable releases are available from Microsoft and use accordingly.
dotnet add package Azure.AI.OpenAI --prerelease
dotnet add package Azure.Identity
dotnet add package Microsoft.Agents.AI.OpenAI --prerelease
Update Your Environment Configuration
Add your OpenAI API key to the existing .env file:
# Xians Platform Configuration
XIANS_SERVER_URL=https://your-xians-server.com
XIANS_AGENT_SECRET=your-xians-certificate

# OpenAI Configuration
OPENAI_API_KEY=your-openai-api-key
Create the MAF Agent Class
Create a new file called MafSubAgent.cs:
Note: We call this class
MafSubAgent, notMafAgent, because production-grade agentic applications typically comprise multiple sub-agents. When you create an agent with Xians, it can have multiple workflows attached to different sub-agents. You'll see this pattern in the following examples.
Add the following code to MafSubAgent.cs:
using Microsoft.Agents.AI;
using Microsoft.Extensions.AI;
using OpenAI;

public class MafSubAgent
{
    private readonly AIAgent _agent;

    public MafSubAgent(string openAiApiKey, string modelName = "gpt-4o-mini")
    {
        _agent = new OpenAIClient(openAiApiKey)
            .GetChatClient(modelName)
            .AsIChatClient()
            .AsAIAgent(new ChatClientAgentOptions
            {
                Name = "MafSubAgent",
                ChatOptions = new ChatOptions
                {
                    Instructions = "You are a friendly assistant. Keep your answers brief."
                }
            });
    }

    public async Task<string> RunAsync(string message)
    {
        var response = await _agent.RunAsync(message);
        return response.Text;
    }
}
AsIChatClient()bridges the OpenAI SDKChatClienttoMicrosoft.Extensions.AI.IChatClient, which MAF'sAsAIAgenttargets.
Update Program.cs
Replace the contents of Program.cs to wire the MAF agent into your Xians workflow:
using DotNetEnv;
using Xians.Lib.Agents.Core;

Env.Load();

var openAiApiKey = Environment.GetEnvironmentVariable("OPENAI_API_KEY")
    ?? throw new InvalidOperationException("OPENAI_API_KEY not found in environment variables");
var serverUrl = Environment.GetEnvironmentVariable("XIANS_SERVER_URL")
    ?? throw new InvalidOperationException("XIANS_SERVER_URL not found in environment variables");
var xiansApiKey = Environment.GetEnvironmentVariable("XIANS_AGENT_SECRET")
    ?? throw new InvalidOperationException("XIANS_AGENT_SECRET not found in environment variables");

var xiansPlatform = await XiansPlatform.InitializeAsync(new ()
{
    ServerUrl = serverUrl,
    ApiKey = xiansApiKey
});

var xiansAgent = xiansPlatform.Agents.Register(new ()
{
    Name = "My Agent",
    IsTemplate = false
});

var conversationalWorkflow = xiansAgent.Workflows.DefineSupervisor();

var mafSubAgent = new MafSubAgent(openAiApiKey);

conversationalWorkflow.OnUserChatMessage(async (context) =>
{
    var response = await mafSubAgent.RunAsync(context.Message.Text);
    await context.ReplyAsync(response);
});

await xiansAgent.RunAllAsync();
Notice the only change from the echo agent: instead of echoing back the message, we pass it through the MAF agent and reply with the AI-generated response.
Rebuild and Run
Go back to Conversations in Agent Studio and chat with your agent — you'll now get intelligent AI-powered responses instead of echoes!
Next Steps
Congratulations! You've successfully created and deployed your first Xians agent. Here's what you can explore next:
- Add Tools & Functions - Extend your agent with custom capabilities
- Implement Chat History - Connect chat history for context-aware responses
Ready to dive deeper? Check out our Core Concepts or explore Advanced Workflows.